FR
FR US
US DE
DE IT
IT ES
ES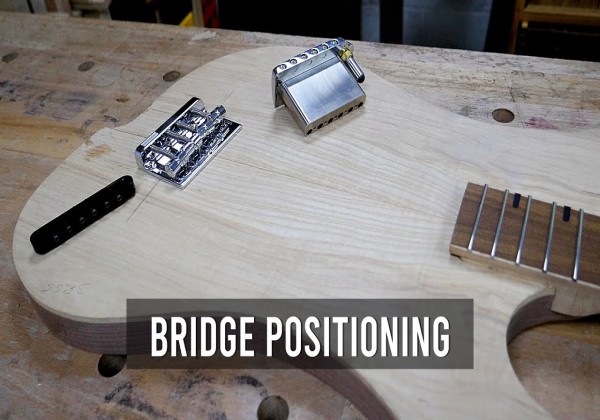
ACHIEVING PERFECT BRIDGE POSITIONING FOR YOUR GUITAR KIT
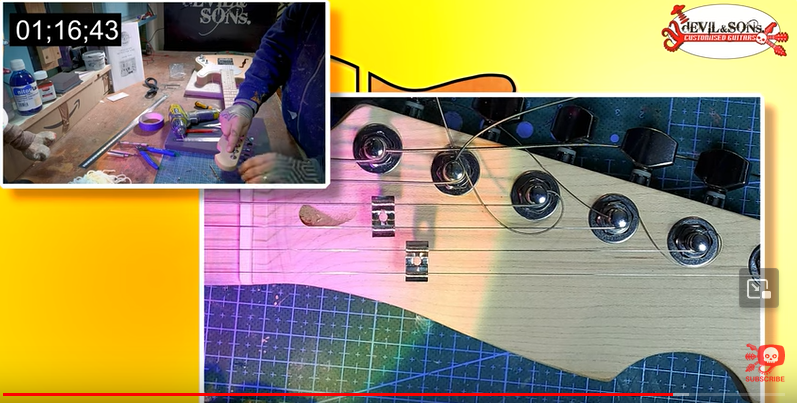
When it comes to assembling a guitar kit, one of the critical factors that significantly influences its playability and tone is the proper positioning of the bridge. Bridge positioning affects not only the instrument's aesthetics but also its intonation, string action, and overall performance. In this comprehensive guide, we'll delve into the crucial aspect of bridge positioning, providing you with step-by-step instructions to ensure your guitar kit's bridge is perfectly placed for optimal results.
Why Bridge Positioning Matters
Bridge positioning plays a pivotal role in shaping your guitar's performance. It directly affects the playability, intonation, and tone of the instrument. An accurately positioned bridge ensures that each string's tension and length are balanced, resulting in better tuning stability and comfortable fretting. Additionally, precise bridge positioning contributes to even string action across the fretboard, making it easier to play complex chords and intricate melodies.
Step-by-Step Guide to Bridge Positioning
Achieving the ideal bridge positioning requires attention to detail and a systematic approach. Here's a step-by-step guide to help you get it right:
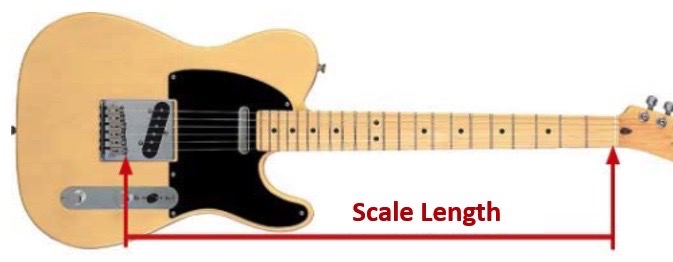
- Measure Scale Length: Measure the scale length of your guitar kit by determining the distance between the nut and the bridge saddle. This measurement ensures that the frets and strings align correctly for accurate intonation. Please check our blog article for more information related to guitar scale length.
- Mark Continuity: Imagine a line extending from the neck and mark where it intersects with the bridge. This imaginary line helps you establish the bridge's relative placement.
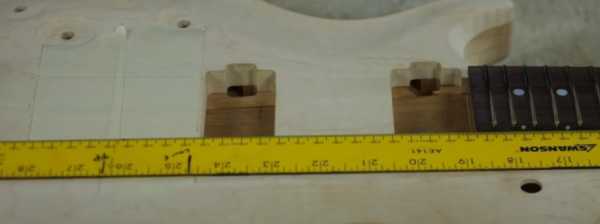
- Pre-Drill Bridge Holes: With the bridge's position marked, pre-drill the body using a drill press or hand drill. This ensures that the bridge screws will be securely anchored.

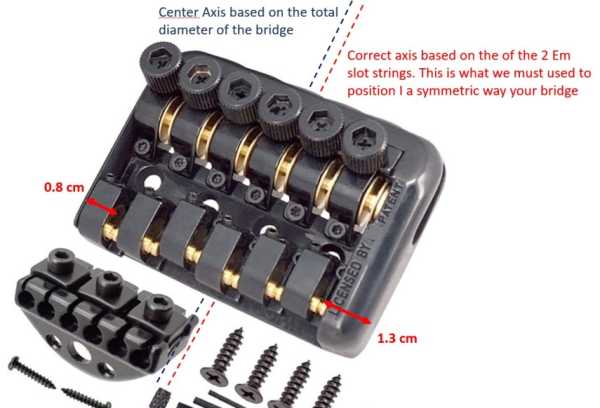
- Symmetry Check: If your bridge isn't symmetrical, ensure that the Em (high E) string aligns correctly with the bridge. Symmetry issues can lead to uneven string spacing and intonation problems.
Benefits of Accurate Bridge Positioning
Accurate bridge positioning offers a range of benefits that enhance your guitar playing experience:
- Precise Intonation: Proper bridge positioning ensures that your guitar stays in tune across the entire fretboard, making chords and melodies sound harmonious.
- Comfortable Playability: Even string action resulting from accurate bridge positioning makes it easier to play complex passages and perform intricate techniques.
- Balanced String Tension: Each string will have consistent tension, promoting a balanced sound and improving tuning stability.
- Enhanced Tone: When strings vibrate at their optimal length, your guitar produces a more resonant and vibrant tone.
Expert Tip: Double-Check for Perfection
Before finalizing the bridge positioning and securing it with screws, double-check your measurements and markings. This extra step ensures that everything aligns precisely, minimizing the need for adjustments later on.
In Conclusion
Achieving perfect bridge positioning is a critical step in assembling your guitar kit. It's the foundation upon which your instrument's playability, intonation, and tone are built. By following the step-by-step guide provided here and paying careful attention to details, you'll ensure that your guitar's bridge is positioned accurately, resulting in a harmonious and delightful playing experience.
Feel free to join the conversation below by leaving your comments and sharing your thoughts. Your input is valued, and we look forward to hearing from you!