US
US FR
FR DE
DE IT
IT ES
ESWIRING THE ELECTRONICS COMPONENTS OF A GUITAR
- The Guitar Fabrik
- BUILD, SETUP & TUNE GUITAR
- Nov 30, 2023 views
- 515
WIRING THE ELECTRONIC COMPONENTS OF A GUITAR
Properly connecting circuits ensures that your guitar produces the desired tone without unwanted interference. Let's review the process of wiring and grounding your guitar's electronics.
Electric Plug Connections of The Guitar Fabric Guitar Kits
For a hassle-free experience, the guitar kits from The Guitar Fabric use all electric plug push-type connection features to easily connect circuits altogether. This eliminates the need for soldering and streamlines the process. Connect the plugs to their corresponding connections, a straightforward task. Remember to attach the remaining ground wire to one of the bridge screws or studs, enhancing grounding without requiring soldering.
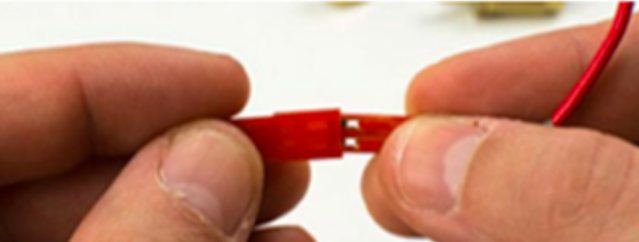
Push type connection feature
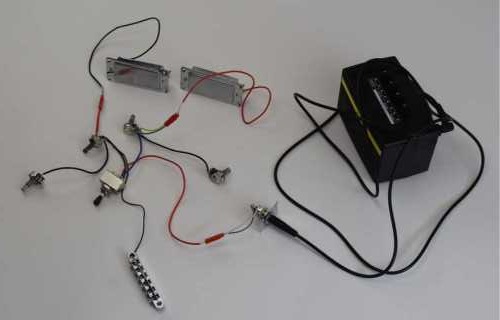
Testing the Electronics Before Installation on the Guitar Kit
Prior to installing the electronics on your guitar kits, it is a good habit to test the electronics upfront and make sure you understand the connections, ensuring everything is working as expected. If we encounter a wiring issue when the electronics are installed in the guitar cavities, you will know it is not due to the electronic components but something else like creating an unwanted short circuit.
To test your wiring component, create the circuit by connecting the socket to the jack plug and your guitar amp as shown below. From there, try different tone, volume, and switch positions and for each case, gently hit each pickup with a metal bar like a ruler, for instance. This way, you can verify that the various components, volume, tone, switch, and pickups behave as expected.
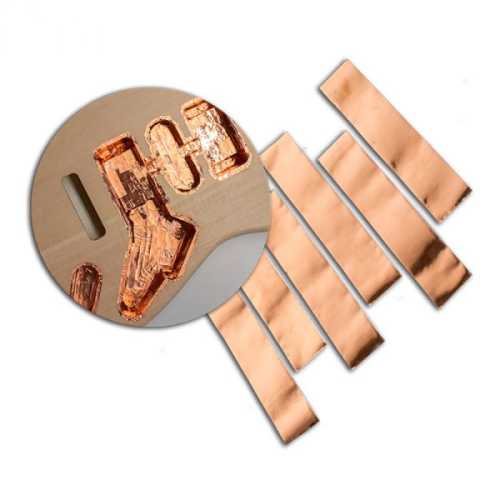
Preventing Interference by Shielding Your Cavities
To mitigate unwanted noise and interference, consider building a Faraday cage in specific areas. Copper shielding tape is a valuable asset for shielding the pickup cavities and back wiring cavity, ensuring a clean and noise-free signal. Read our specific article on this topic.
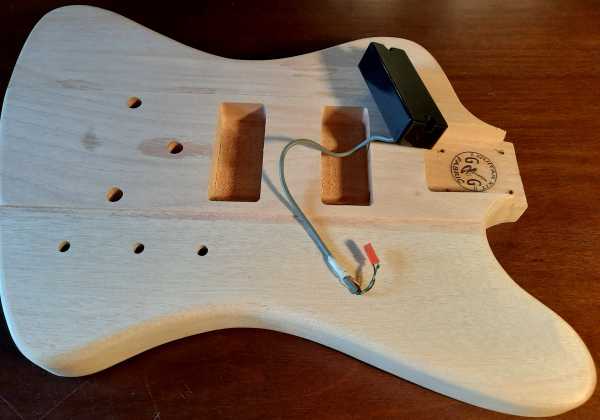
Installing Electronics into the Cavity and Grounding
All connections can be housed in the rear cavity. Ensure that wires within the cavity are well-isolated to prevent electrical short circuits.
Routing example on the Thunderbird guitar bass: Wires should pass through pre-drilled holes associated with their components, ensuring clean cable management.
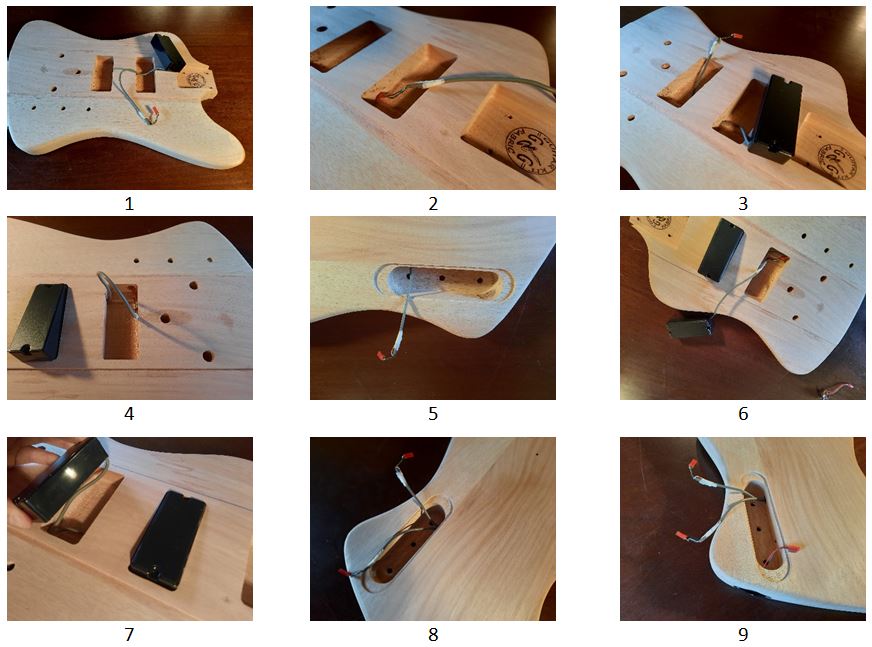
Connecting example on a Firebird guitar kit: Organize the wiring between pots, jack sockets, and pickups meticulously, while using push-type connections for a seamless setup. Be very careful that the wiring inside the cavity does not touch each other and create an electrical short circuit.

Installing wiring components in relevant holes: Install and fix the various components related to wiring, such as potentiometers, jack socket, and switch.

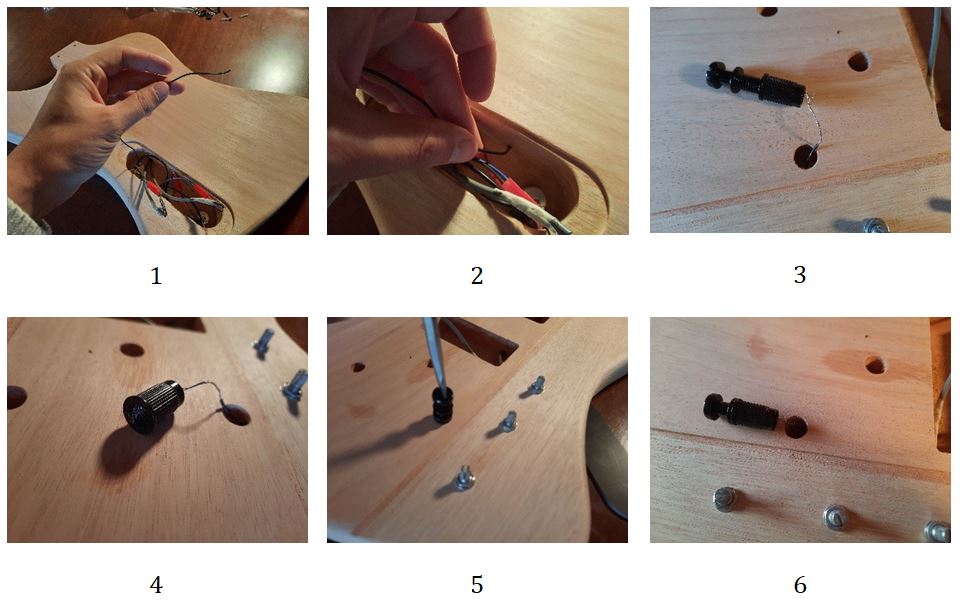
Grounding example on a Tune-o-matic bridge: Pass the ground wire cable through the hole connected to the bridge and wire it to the studs as demonstrated. Strip the wire and insert it into the stud parts.
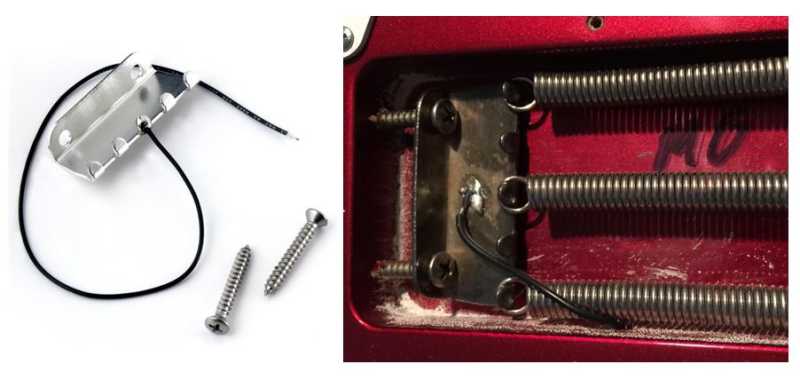
Grounding example for a tremolo bridge with springs: To begin, lay the groundwork for flawless tremolo functionality. In a Floyd Rose Bridge installation, attach spring screws within the tremolo cavity. A key step is to solder these spring screws to the ground wire stemming from the volume control cavity. This meticulous grounding ensures optimal signal integrity, preventing unwanted noise and interference while amplifying your guitar's sonic brilliance.
In conclusion, wiring and grounding the electronics of your guitar is a meticulous process. Follow the provided method to achieve optimal performance, minimize interference, and create a guitar that delivers the desired tone.
Related Products

Related Posts

- The Guitar Fabrik
- Jun 27, 2025
- 291views
IBANEZ CUSTOM BASS SHOWCASE

- The Guitar Fabrik
- May 29, 2025
- 421views
B.C. RICH CUSTOM GUITAR SHOWCASE

- The Guitar Fabrik
- May 1, 2025
- 175views
MUSIC MAN CUSTOM BASS SHOWCASE

- The Guitar Fabrik
- Apr 28, 2025
- 724views
RICKENBACKER CUSTOM GUITAR SHOWCASE
Related Products
Recent Posts