US
US FR
FR DE
DE IT
IT ES
ESINTEGRATING GUITAR NECK TO BODY
- The Guitar Fabrik
- BUILD, SETUP & TUNE GUITAR
- Aug 16, 2023 views
- 998
NECK INTEGRATION TO GUITAR BODY
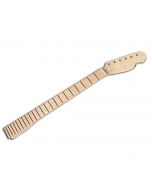
Crafting your own electric guitar is a gratifying endeavor. Mastering the assembly and attachment of the neck is vital for a well-playing instrument. This guide walks you through the process of fitting and securing the neck into a body for both a set-in neck or bolt-on neck.
Assembling the Neck Mechanics
Creating a stable foundation is key. Follow these steps:
- Tuner Installation: Push tuners into the headstock's back.
- Bushing Placement: Attach tuner washers to bushings. Place bushings on tuner pegs. Gently tighten bushings with a 10mm spanner.
- Screwing: Secure them with provided screws.
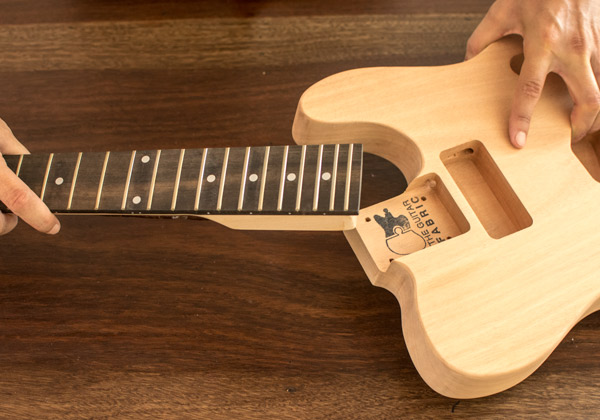
Neck to Body Attachment: Integration Check
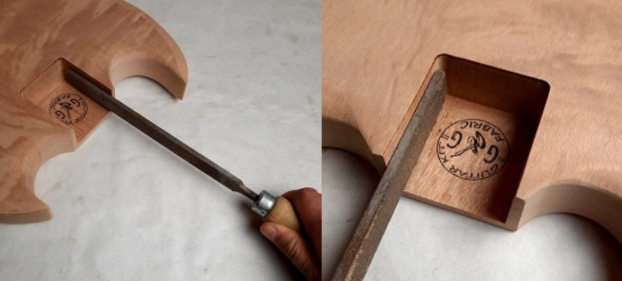
Verify Neck Heel Integration: Ensure the neck heel fits the body. File the neck pocket slightly—if required—for a perfect match. If the neck heel is slightly wider, file both sides of the neck pocket equally until a snug fit is achieved.
Neck Alignment & Inclination Check
This is a very important step, particularly for set-in necks. The alignment will ensure that the strings are all well-connected to the neck, providing optimal playability. The inclination will ensure that your string action will be correct once the guitar is finalized. Note that for string action, you will have other levers later on, such as truss rod and bridge height adjustments. It is good practice to get close to your desired string action from the start. Generally, adjusting neck inclination is not needed for most guitar kits, especially beginner and intermediate ones.
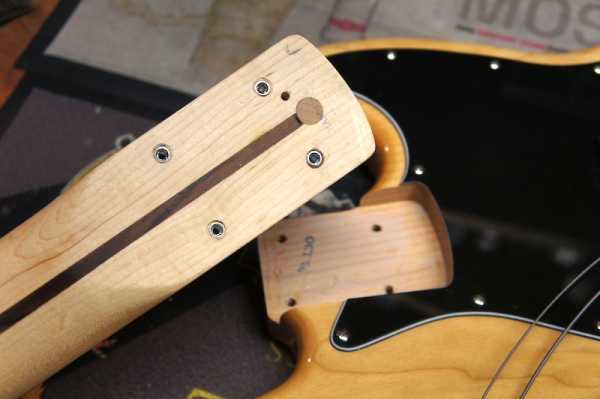
Preparation for Alignment and Inclination Check: To verify alignment and inclination, fit the neck without gluing or screwing it in. If your neck integration is good, you won't need anything else; otherwise, you can use a clamp to secure it. Then install the bridge, the two E tuners, and the pickups (you don't need to fix the components with screws). To fix the strings, you can use masking tape as shown in the image below.

Alignment: From there, check that the strings are equally positioned on the fretboard for each E string. If you need to adjust string alignment with the fretboard, slightly move the neck within its neck pocket; if that doesn't provide enough adjustment, file the sides of the neck pocket slightly (normally, you will need less than a 1-degree adjustment). Also, ensure that the pickups can be moved to a centered position relative to both E strings.
Inclination/String Action: Measure the current string action at the nut, the 12th fret, and the last fret of the neck. Compare the string action at the last fret to your target string action. Check your string action levers: if you glue or secure the neck as it is, will you be able to easily achieve your desired string action with the other available adjustments on your guitar kit?
- If the current string action is close to your target string action, you can install the neck as it is.
- If the current string action is too high (2-3mm higher than your target), you need to increase neck inclination.
- If the current string action is too low (2-3mm lower than your target), you need to reduce neck inclination.
Methods to Adjust Neck Inclination: Sand the heel to adjust the inclination or use a shim. Sand slowly, then check, and sand slightly again if needed. Note that adding even a small inclination has a significant impact on string action. You shouldn't need to sand a lot.
Scale Length Check: If you haven't checked the scale length yet, you should do so. See our article on this topic.
Predrilling or Gluing the Neck
- Option 1, Predrilling for Bolt-On Neck: Keep the neck installed as previously and use a drill bit to mark the screw positions. It is also advised, particularly if you have a bit of inclination on your neck, to drill directly through the body predrill holes with a small drill bit (like 2mm). Then remove the neck and use a wider drill bit to finalize the neck drill. Reinstall the neck and screw it to the body with the four provided screws.
Check our guidelines regarding predrilling and screwing! Be very careful with hardwood like ashwood, as it is possible to break the screw if you don't predrill properly.
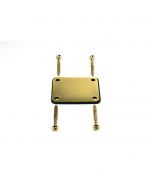
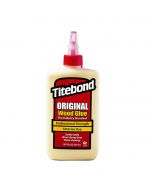
- Option 2, Gluing for Set-In Neck: Clean the neck pocket and neck heel. Use wood glue like our Titebond wood glue, applying a light but even coat on the surfaces of the heel and neck pocket that will be in contact. Ensure your neck is integrated as it was in your previous tests related to alignment and neck inclination, then clamp for 24-48 hours. Remove any excess glue if necessary.
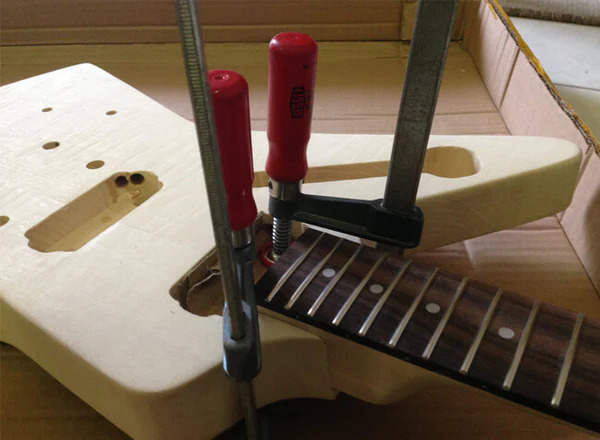
Clamping neck after gluing
Comments: For optimal gluing and sustain, you shouldn't paint the neck heel and the body neck pocket on the surfaces where the neck and body are in contact. The wood glue will perform better on wood.
Related Products
Related Posts

- The Guitar Fabrik
- Jun 27, 2025
- 301views
IBANEZ CUSTOM BASS SHOWCASE

- The Guitar Fabrik
- May 29, 2025
- 437views
B.C. RICH CUSTOM GUITAR SHOWCASE

- The Guitar Fabrik
- May 1, 2025
- 182views
MUSIC MAN CUSTOM BASS SHOWCASE

- The Guitar Fabrik
- Apr 28, 2025
- 742views
RICKENBACKER CUSTOM GUITAR SHOWCASE
Related Products
Recent Posts