US
US FR
FR DE
DE IT
IT ES
ESGUITAR KIT PREP: VERY FIRST STEPS
- The Guitar Fabrik
- BUILD, SETUP & TUNE GUITAR
- Jun 10, 2024 views
- 152
PREPARATION BEFORE STARTING THE GUITAR BUILD
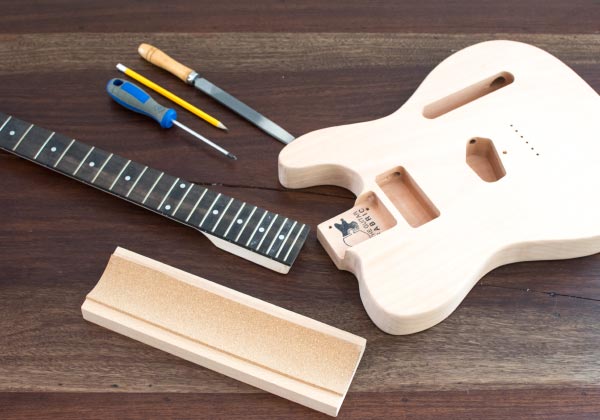
Painting and constructing a high-quality guitar is achievable for anyone who diligently follows the steps involved in guitar building. One of the very first steps is to inspect your kit to familiarize yourself with it and ensure everything is as expected. Therefore, we strongly advise you to conduct an overall check-up of your guitar kit:
- Familiarize Yourself with the Kit: Examine the various parts and understand their placement. And don't forget to keep track of those screws!
- Overall Quality Check on the Neck and Guitar Body
- Inspect for any glue stains, particularly on flamed, quilted, or spalted maple tops. If you find any, remove them using 400/600 grit sandpaper. Gradually sand and check for stain removal until the guitar's surface is flawless.
- Examine the fretboard, frets, and wood in general to ensure there are no cracks.
- Neck and Body Pre-assembly - further detailed in the neck-to-body integration article.
- Attempt to assemble the body and neck to ensure a proper fit. Ideally, install the bridge and position two strings or thread to represent the two E strings. This initial step helps you check alignment and string action (later steps will address string action in more detail, but it's beneficial not to be too far off initially). As noted, this is particularly important if you have chosen a guitar kit with a set-in neck.
- Wiring and Pickup Testing - discussed in the guitar wiring article
Next, you need a clear idea of the finish you want for your body and neck. This should correspond to the products you have already selected, such as a finishing kit.
Finally, prepare a workspace and gather the tools you might need as described in the article List of Tools to Build Your Guitar. Allocate space where you can work on your guitar kit for approximately 1 week to 1 month, depending on your availability. The painting process can be time-consuming due to the drying time required for different layers of stain, varnish, etc. Ideally, have a space where you can leave your work during the entire finishing process. Your workspace should be clean and free from dust to achieve a smooth paint result. Paint outside only if necessary, as insects attracted by finishing smells may stick to your finish.
We also recommend allowing the wood to rest for 2 days at room temperature and humidity to stabilize its density.
Related Posts

- The Guitar Fabrik
- Jun 27, 2025
- 291views
IBANEZ CUSTOM BASS SHOWCASE

- The Guitar Fabrik
- May 29, 2025
- 421views
B.C. RICH CUSTOM GUITAR SHOWCASE

- The Guitar Fabrik
- May 1, 2025
- 175views
MUSIC MAN CUSTOM BASS SHOWCASE

- The Guitar Fabrik
- Apr 28, 2025
- 724views
RICKENBACKER CUSTOM GUITAR SHOWCASE
Recent Posts